


Download and Install Adobe Media Encoder on Windows PC and macOS Full version with the latest features. Any format can be ingested, transcoded, outputted, and released.


Adobe Media Encoder is a transcoding and rendering software that allows you to encode audio and video in a range of formats. It can be used directly, but it still works as a companion to Adobe Premiere Pro, Adobe After Effects and Adobe Prelude.
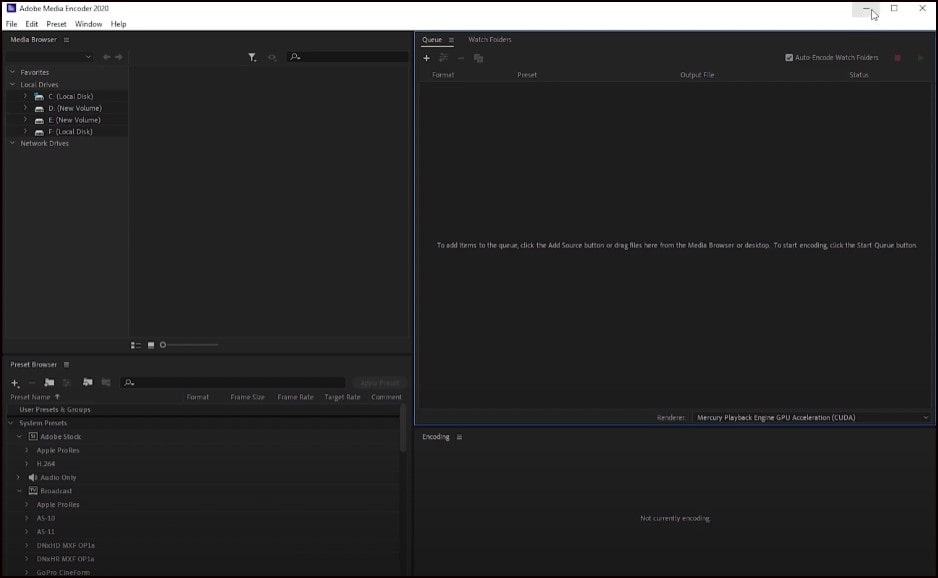
The interface is split into four panels. Pre-set browser, coding, and watch folders The cue is the application’s heart; here you can see all of the files you have added for rendering, and in the preset browser you will be able to easily find almost every possible format for your output code.
How to download and Install Media Encoder
If you want to set up Media Encoder on your PC then follow below instructions.
Step 1: Download Media Encoder Installer
Firsty, you have to save the Media Encoder installation file from the link below.
Step 2: Create Adobe Creative Cloud
Now you will have to create an Adobe creative cloud account. If you already have an account then you can enter your Email and password in case you don’t have any account then you can create a new account as well. Then Click on “Start Installing”

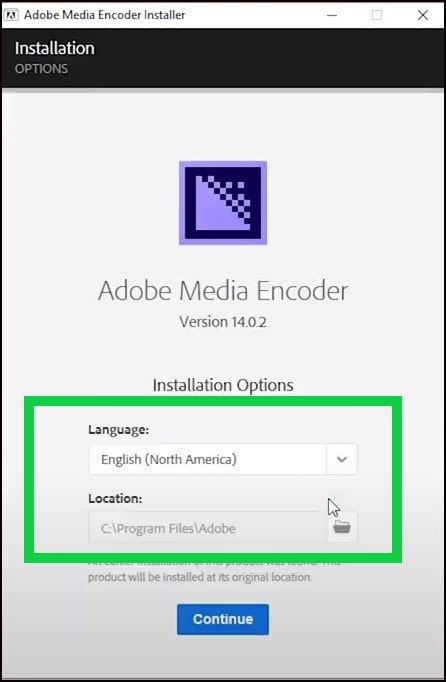
Step 3: Adobe Media Encoder Installer
When you launch an offline installer you will get a few options where you need to select “Language” and “Location” the software supports various languages whatever you prefer just select after that click on the blue “continue” button.
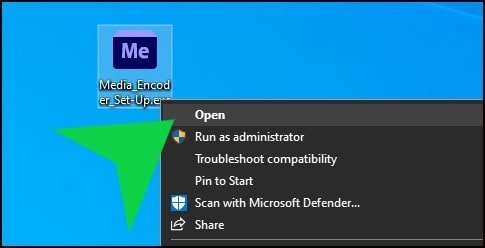
Then it will start installing software into your system, it can take a few minutes so wait until it completes. Once you complete the installation you will get a successful message. It will automatically create a shortcut icon on your Desktop Or you can run it from the taskbar.
Now we have successfully installed Adobe Media Encoder on PC without facing any error, now you can create as much as you want project with it.
Encoding tracks the progress of the latest encoding job; if you’ve set up watch folders, the watch folder panel displays their current status. How does a Adobe media encoder work? First, add a source to the cue. Second, pick a preset or set a custom one.
Finally, click on the output file if you wish to adjust the output name or position. Finally, push the green start cue button and let a Toby Media encoder do the crunching.
Download Adobe Media Encoder for Windows
System Requirements
| Operating System | Windows 7/8/10 and macOS (64 bit) |
| Processor | Multicore processor with 64-bit support required. |
| DirectX | 11 or Newer version |
| Ram | 4GB Minimum Ram |
| Sound Card | A windows-compatible sound card is required |
| File Size | 950MB |
- Multicore processor with 64-bit support required.
- Microsoft Windows 7 with Service Pack 1 (64 bit) or Windows 8.1 (64 bit), or Windows 10 (64 bit)
- Supports Windows 10 Creator Edition.
Is Adobe Media Encoder free?
Media Encoder is not a free piece of software. If you use it, you will have to pay either monthly or annually. It includes Adobe Creative Cloud membership, which can be purchased from the official website. However, it provides a free trial edition for you to see how it works. As a result, if you are a novice, you can try its trial period to get a feel for the interface. When you’re confident, upgrade to premium.
Adobe Media Encoder is not installed
If you are receiving the error Adobe Media Encoder is not installed, when you are trying to queue a video from Adobe Premiere to render in Adobe Media Encoder, you can fix this error by making sure that both Adobe Premiere and Media Encoder are up to date and are running the same version number in the Creative Cloud application. If both programs are running the same version, you shouldn’t run into this error anymore.
Also read: Adobe Photoshop Download Free for Windows 7/8/10 and Mac
How To Compress Video File Size In Adobe Media Encoder CC
You can easily Compress Video File Size In Adobe Media Encoder CC | Downsize / Reduce Video FileI want to take a look at compressing a video. Most people know that video files can become fairly large.
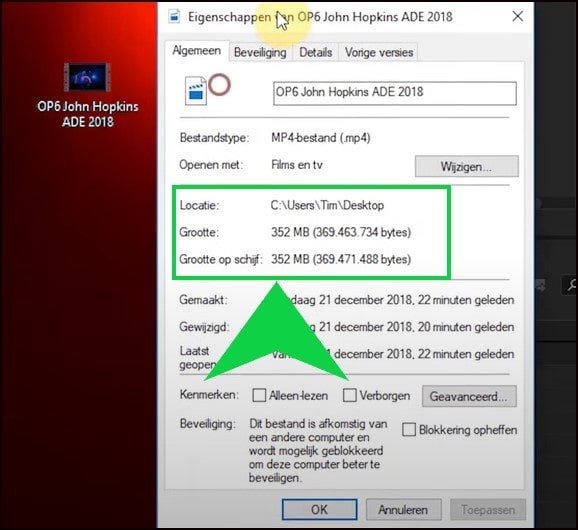
Let’s take a look at this video clip for instance. It’s showing that it has 315 megabytes in it, but I like to compress it further down. We want to do this without compromising too much quality loss. So let’s started.
- Open Adobe Media encoder for now and now we want to import our footage.
- You can do this by drag and drop your footage.
- It’s added to the media encoder row, but you can also click on the plus icon browse to your destination folder Double-click it, and then it will also be added if you drop down this menu.
- You can see there are a lot of codec options to choose from but for now.
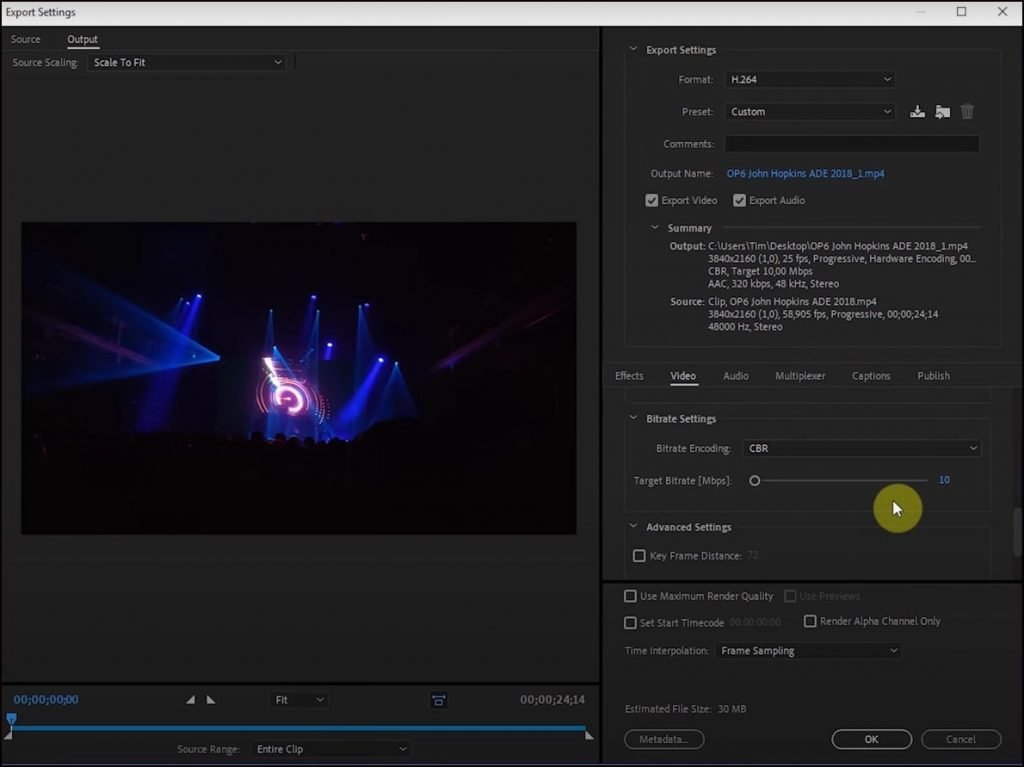
- Click on H.264 to make it an mp4 file And now we’re going to click on ‘Match source’ so you can edit the settings to compress the file this new window will pop up and For now.
- We have selected the video tab here.
- You can see the dimensions of your video in this case. It’s 4k.
- The framerate I want to have is 25 fps, so keep it at the first one ‘CBR’ and set it to 5 megabytes, and now you can see that the file will be 15 megabytes But because the original file was 350 megabytes.
- save it to the desktop Hit save.
- Make sure if you have the option to select GPU Acceleration because it will increase the render speed.
- Hit the play button Let it do its job and if it’s finished.
We’re going to take a look at the output file and see how the quality holds up. I know there’s some pixelation going on in the blacks But I think with some color grading we can correct this and also keep in mind that most of the productions these days will be used to watch on the telephone So it will be much better quality than you see on the full screen.
Adobe Media Encoder is a trusted and secure way to transcode and renders projects. The software has developed for both platform macOS and Windows. You can download it for free no matter which platform you use.
For more such interesting article like this, app/softwares, games, Gadget Reviews, comparisons, troubleshooting guides, listicles, and tips & tricks related to Windows, Android, iOS, and macOS, follow us on Google News, Facebook, Instagram, Twitter, YouTube, and Pinterest.


